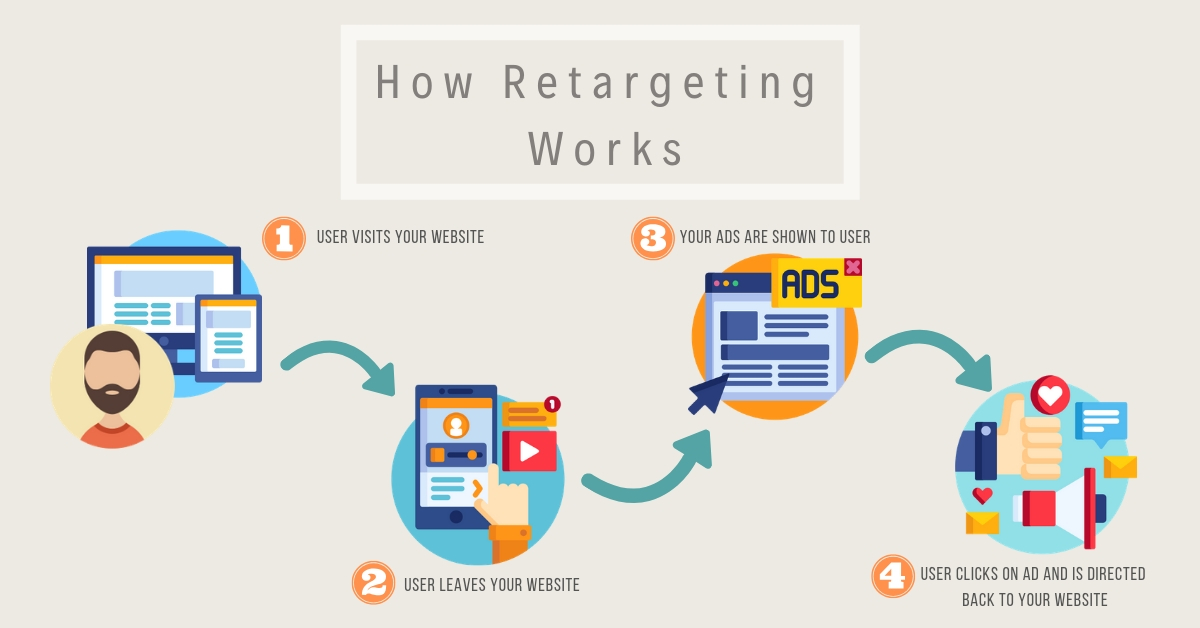
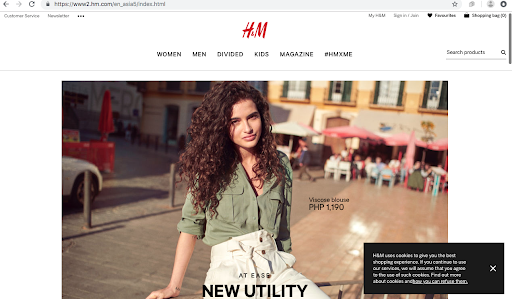
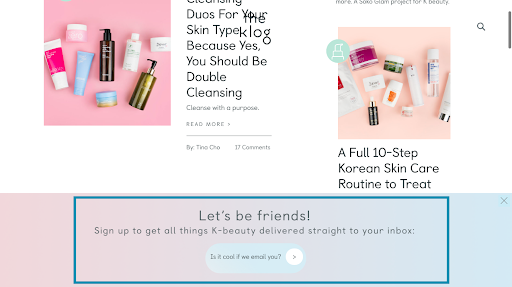
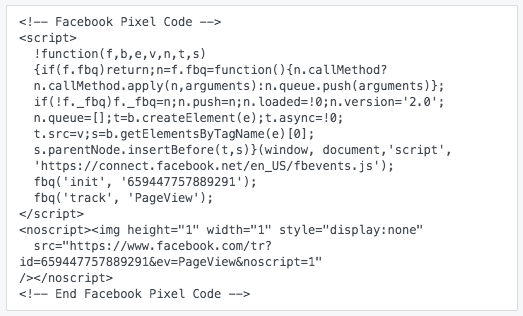
If you run a small business online, you know how tough it is to get your products or services noticed. What’s even worse is that buyers nowadays can easily get distracted before they even make a purchase. They end up leaving your website before buying anything. As crazy as it sounds, 97% of people who visit your site for the first time leave without buying anything. But what if you have the chance to bring those people back? Remarketing/retargeting: A form of online marketing that helps you convert website visitors into customers after they leave your website. Remarketing is a type of online advertising that only targets people who have visited your website or have previously bought from your site. Have you ever been on Amazon looking at a coffee maker, and then after you leave Amazon you start seeing that coffee maker everywhere? It starts showing up on the side bar, on your Facebook feed, and you feel like someone’s been listening to your conversations? You have just been retargeted. What does it mean to be retargeted? It’s quite simple. Remarketing or retargeting is when you visit a website and don’t take action, such as inquiring or purchasing that product. That website will then ‘pixel’ or track you so that it can start showing you ads across the internet. Now, it sounds creepy but it actually has a great purpose. You don’t want to see ads that are not relevant to you. For example, I don’t want to see makeup ads if I’m shopping around for a car or a coffee maker. I want to see ads that are relevant to me that might be helpful. Remarketing/retargeting is a way that you can provide value to your leads and customers by showing them ads for things they are already interested in. Pixel-based retargeting is the most common type of retargeting. It’s when a pixel or a cookie (a piece of unobtrusive JavaScript code) is dropped on an anonymous visitor’s browser. When the code takes full effect and the visitor leaves your site, the cookie informs your retargeting provider when to show specific ads based on specific pages they have visited. Basically, the pixel-based method is reliant on the amount of web traffic you get. Take H&M, for example. The image above is from their website home page. See the pop-up message informing the visitor of cookies? These cookies will most likely include one for their pixel-based retargeting. The second picture is H&M’s Facebook ad. The ad immediately showed up on my Facebook feed after visiting their site. The pros of pixel-based retargeting is that it works fast. Anyone who has previously visited your site can immediately be retargeted right after they leave your page. It’s also particular. It shows ads depending on the specific page the visitor opened. The pixel-based retargeting method can be behavior-based, adjusting to the visitor’s online behavior. As mentioned above, the pixel-based method is reliant on the amount of web traffic you get. This fact is the only con of this method. The campaign will only work if you get a lot of web traffic. This means that you have to create a marketing strategy to get visitors to open your website (and then leave) for it to work. If you’re interested in learning how to set up pixel-based retargeting on Facebook or Google, scroll to the bottom of this article for our how-to. List-based retargeting is a type of retargeting that will only work if you have the visitor’s contact information in your database. This type of retargeting allows you to customize your criteria for your ads. You get to choose who goes in which list. The downside is that if a person’s email address is different from their social network, then they won’t be able to see your ads. You’ll also have to manually upload and maintain the list of email addresses. It takes up more of your time and is less automatic than pixel-based retargeting. For example, check out Althea, an online shop that sells Korean skincare and makeup products. The image above is their website homepage, where they ask you to sign up to be on their email list. After giving the site your information, you will be a part of their ads list as well. This is a picture taken from my Facebook feed, and it features Althea’s ad. The retargeting immediately happened the minute I gave the site my email and left their website to go to Facebook. To set up a list-based retargeting campaign using Google Ads, head to this help page. Scenario 1: Customer hears about your product once, goes to your website, and decides to wait to purchase. Customer forgets about you. Scenario 2: Customer hears about your product, goes to your website, and leaves without purchasing. Customer is reminded of your product the next day and the next via retargeted ads. Customer remembers they want to buy and purchases on day 3. The key is to reach the 97% who won’t buy the first time they’re on the site. Many of those people may still be interested in your product. You just need to build brand awareness and stay in front of their eyes. It’s so much simpler to target a hundred people who visited a specific page than it is to target millions of people. Showing millions of people your ad will exhaust your advertising budget, but if you stick to that group of 100 or 500 people that you’re targeting, you will appear to be everywhere – on Facebook, on Instagram, on their CNN or Fox News or whatever else they consume. It will make you appear to be omnipresent and drive those people who are already interested back to your site. There are two common platforms for retargeting ads, and those are Facebook and Google. Here’s how to add a tracking pixel to your website using Facebook and Google. You can test to make sure either of your pixels are working by visiting builtwith.com. Type in your site’s URL and if you see Google Analytics and/or Facebook Pixel in the Analytics and Tracking section, you did it! The retargeting method is a smart way to get the most out of your marketing budget and website visitors. It will take care of all those customers who couldn’t pull the trigger the first time around but are still interested in your products or services. Don’t let them slip away! Thinking about trying remarketing? Let us know in the comments below!Enter remarketing.
There are two types of retargeting ads:
Pixel-Based Retargeting

List-Based Retargeting

Pros of remarketing
1. Retargeting builds awareness

2. Remarketing makes the most of your advertising budget
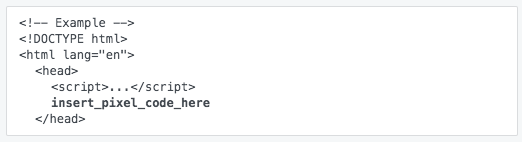
How to Set Up Pixel-Based Remarketing
Facebook
Google
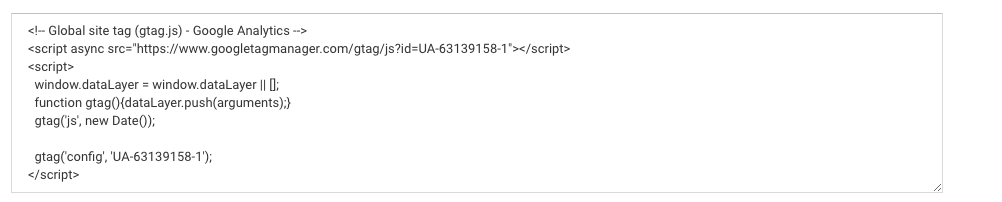

Congratulations, you’re now a programmer.
In conclusion…
Read Also:

With Just Digital,
Success is Easy-Peasy Lemon-Squeezy.
When life gives us lemons, we generate results. Contact us today and we can start making lemonade.